Tuesday, November 01, 2005

Web Pages Made Easy - Notes from Lesson 2

Lecture and Discussion


Lesson 2: Structuring Content


Now that you have the blueprints for your Web page and you have set up the foundation, you can start building it.

In your reading, you were introduced to some of the most basic tags you'll need to define the structure of your text. Now we'll discuss them in greater detail and talk about some ways you can implement them on your own Web pages. We'll start with your home page. A home page is the starting page in any Web site. Typically,
home pages contain the most general content; a welcome message, a statement about the purpose of the site (if the purpose is not obvious), links to other pages in the site, and maybe an image to spark interest. But first
things first ... we'll start with the fundamental ingredients and slowly introduce the features that will make your Web site complete.

Defining Headings and Paragraphs

When you create a Web page, it's important to consider the structure of the document. You define the structure of your pages with the HTML tags that you choose. A basic Web page that contains text typically consist of a heading, followed by one or more paragraphs.

For example, if you want to have an opening statement on your home page, such as:


Welcome to the Clements Family Website!


...then it makes sense to define that statement as the top-level heading for that page. To do this, you
would wrap the statement in an <h1> tag, as follows:

<h1>Welcome
to the Clements family Website!</h1>
You might also need one or more sub-headings, followed by additional paragraphs. For example, you might
want to provide general information under your top-level heading, and then create another heading with associated contentβ€”something like this...


Welcome to the Clements Family Website!


With family members in 18 different states,
it's not always easy to keep in touch. This is our little corner of the
Web, where we can share news, information, and pictures.


Just visiting?


You don't have to be a member of the Clements
family to participate. We welcome new friends from all over the world!

Here, the "Just visiting"
heading is defined by an <h2> tag. It logically follows the <h1>
tag above it. The paragraphs under each heading are defined by the <p>
tag.


Tip!

You can get a lot of
good ideas for your Web site by browsing the Web for sites that have a
similar purpose. Make a note of the types of content they provide and the
way they present their information.


Browsers display headings as
bold text at different font sizes (the <h1> tag gets the largest font
size and the <h6> tag is displayed with the smallest font size). You
can use these headings much in the same way that newspapers use headings--the
larger the heading, the greater the implied importance of the content.

Even if you don't want your
page to follow this kind of traditional structure, you should try to use
whichever tag best describes or defines a section of content. If it's a
paragraph, use the <p> tag. If it's the first heading on a page, use
the <h1> tag. Before you define any headings or paragraphs, you should:


  • Consider the objectives you've
    established for your site.


  • Review your mission statement
    to keep your content focused.


  • Create a rough sketch of your
    page so you can work toward a specific goal.


Inserting
Line Breaks

If you want a word or phrase
to start on its own line without starting a new paragraph, you can use
the line break tag, <br>. This tag is not a container, so it does not
accept a closing tag. In this paragraph, for example, you can force any
word to the next line,


like so.

Take another look at page
16 in your bookβ€”you'll see that you can use line breaks to create a series
of short lines of text, to format poetry, recipes, and just about anything
else you can think of.

Producing
Bold and Italic Text

You can use the <b> and <i> tags to make text
bold and italic, respectfully, or you can use the <strong> and <em>
tags. What's the difference between these two sets of tags?

To the eye, nothing. But their purpose is slightly different. The <b> and <i> tags tell the
browser to display the text bold or italic. The <strong> and <em>
tags tell the browser to emphasize the text, but it doesn't necessarily
tell it how it should be displayed. That part is up to the browser.

Some browsers are not visual.
There are many software programs for users with visual disabilities that
audibly present the content of Web pages. When one of these devices encounters
text in an <em> tag, it will sound out spoken emphasis. This will not
happen with the <b> tag, because "bold" is a visual description that
has no meaning in speech. The <strong> tag will produce stronger
emphasis
than it will for the <em> tag. You might not need to make
this distinction for your first Web site, but it's something you can put
in your toolbox in case you need it.

Creating
Block Quotes


Tip!

You can insert multiple
paragraphs inside a block quote.


You can wrap text in a <blockquote> tag to define it as a long quotation, or simply to indent it on both sides.

This is block quote
text. Keep in mind that some older browsers make block quote text italic
as well as indented.

Discussion

Now you know the fundamentals
of structuring text, and you can begin to add content to your page. Post
your comments to the following discussion items in the message board:


  1. Do you think it's important
    to distinguish between emphasized text and bold text? Explain.


  2. Why do you think it's important
    to use whichever tag best describes the content it contains?


Web Pages Made Easy - Notes from Lesson 1

Glossary

Absolute URL: An absolute URL is the full address of a page or resource, such as http://www.freepeoplesearch.info/yahoo-people-search.html.

Color name keywords: The 16 official color names you can use as values of the color and background color properties.

CSS: Cascading Style Sheets, the standard presentation language of the Web.

Embedded style sheet: A style sheet that's defined by the <> tag and is inserted into the section of an HTML document.

GIF: GIF is an image format that's typically used for non-photographic images.

Hexadecimal values: Hexadecimal values are color codes that begin with a pound sign ( # ), and offer the full spectrum of color.

HTML: Hypertext Markup Language. The standard structural markup language of the Web.

JPEG: JPEG is an image format that's typically used for photographic images with many colors.

Properties: CSS consists of pre-defined properties that take specific actions on an HTML element.

Relative URL: A relative URL is one that does not list the full path to the image. Instead, it's an image who's address is relative to the current page. (Also called relative addressing)

Selector: A selector is the part of a style sheet rule that attaches the style command to an HTML element.

Style sheet: A series of CSS rules that determine how HTML elements are displayed.

Tooltips: Pop-up messages that appear next to your cursor when you hover over an image that has alternative text, or when you hover over a link that has a title.


--------------------------------------------------------------------------------
Lesson 1: Introduction to the Web and HTML

I strongly recommend you get in the habit of using lower case tags from the start. Use <> instead of <>, for example (WITHOUT the extra spaces on your Web page).

While current browsers don't care which you use, future browsers might.

The newest version of HTML is called XHTML. Part of the new standards call for all lower case tags. That's really all you need to know for now.

However, for the highly motivated with a good background in HTML, you might want to visit:

http://www.nypl.org/styleguide/xhtml/guidelines.html

for a good summary of XHTML differences.

Again, in the distant future, special browsers might require lower case tags, so develop good habits now.

With the first reading assignment under your belt, you're almost ready to get your hands on HTML. The following topics will help to reinforce what you've learned and introduce some additional concepts that will help you to create your first Web page.

In your Web browsing experience, you've probably seen many Web pages that you'd love to emulate on your own site. If you have ever viewed the source code for one of these pages, you might have been overwhelmed by the code. Not to worry -- like all new things, you need to start with the most basic skills and progress toward the more complex features. Many effective Web sites are built with simple HTML only. Sometimes, a simple layout is the most effective.

In this lesson, you will learn how to get started with a new Web site project. You'll start with a plan, and steadily begin to make your vision a reality. All HTML pages start with the most basic ingredients and build from there. Your HTML skills will follow this pattern. You will start your Web site by creating a "skeleton"
-- the basic components that all Web pages contain.

Getting Started

Before you can build a house, you need a plan -- a blueprint you can follow to keep yourself focused on the end result. Likewise, before you begin to create your first Web page, you should first draft a plan of action. Start off with a mission statement. Most companies and organizations have a mission statement that describes the purpose of the company, its goals, and how it meets specific needs in the marketplace or community. Mission statements don't need to be long -- most are only about a paragraph.

An example of a mission statement might be:

"My Web site will provide a central location for my family members across the country to share news, pictures, interests, and family plans. It will provide a complete list of addresses, phone numbers, email addresses, birthdays, event reminders, and vacation plans."

Or, your Web site might have a more specific focus:

"This Web site will provide golfers with the most comprehensive list of information and reviews of golf courses all over the country. It will also provide information on obtaining tee times, seasonal fees, and nearby lodging and dining."

Every effective Web site fills a niche. Your mission statement should describe how your Web site will fill a niche, or need that is not currently met. Get a piece of paper and a pen, or use a text editor to write your mission statement. As you create your first Web page, you'll likely find yourself looking at your mission statement to keep focused on your objectives. Write concisely, and try to capture your goals in a single paragraph. Ask yourself the following questions and make a note of your answers:

What is the objective of this site?
Who will the audience be?
How will users benefit from this site?
What information will this Web site provide?
What will you provide that will keep users coming back to your site?

A good plan will help keep you focused on your goals. Once you have answered the questions listed above and you feel satisfied with your plan, you're ready to create your first Web page.

What Are Web Pages, and how Do They Work?

First, let's review some of the basics.

Web pages are simply text files that are saved with a .html or .htm extension.
Web pages are built with HTML, the Hypertext Markup Language.
Content in HTML is enclosed in various elements (tags) which define the structure of your pages.
Web browsers like Internet Explorer and Netscape Navigator display your page content according to the HTML tags you use.
As mentioned on page 8 in your book, all HTML tags consist of angle brackets (<>), with the tag name in the middle. Most HTML tags are containers, which means they contain your content, and/or other HTML tags. Container tags have an opening and closing tag. For example, all HTML pages must begin with the tag, and end with the tag. This defines the page as an HTML document.

Every Web page you create must have four basic container tags:


  • <html>


  • <head>


  • <title>


  • <body>


These four elements make up
the "skeleton" of a Web page. All Web pages contain these elements.


    The <html> container
    comes first. This tag will contain all the other tags and content in your
    document:


    The <head> container
    comes next. This is where you'll enter your page's title:


    Next, you'll insert the <title>
    container inside the head section. You will enter your page's title inside
    this container, as follows:


    Finally, the <body>
    container comes after the closing head tag. This element will contain all
    the visible content of your page.


    Tips:
When your visitors bookmark your page, the title you enter will appear as the title of their bookmark. It's important to make sure your title is relevant to your page content, informative, and brief. For example, if your title is "My Page", users might not be able to identify the page when they look through their bookmarks at a later date. A more effective page title might be, "(Your Name)- Welcome!", or the name of your Web site or organization.

It's up to you if you want to write you HTML tags in uppercase or lowercase text. Using lowercase text is a little faster and easier since you don't have to use the SHIFT key constantly, but some developers prefer to use uppercase tags because it can help to visually distinguish tags from page content.

Once you have these basic structures in place, you can begin to create your page content.


Discussion

So far, we've tackled some of the essential building blocks that all Web sites start with. You have
a plan of action, a mission statement, and a clear set objectives for your project. Now it's time to share your vision with others.


  1. Post your mission statement
    in the message board.


  2. Share any comments or questions
    you might have about what you've learned so far.


  3. If you already have a Web site
    work-in-progress, please share it with the class.

Web Pages Made Easy - Lesson 1 - Activity

Activity


Lesson 1: Introduction to the Web and HTML


In this activity,
you'll create a folder that will hold all your Web content. You will then
create a new HTML document and save it in this folder. This activity is
the starting point for the other activities you'll be working on. Each
new activity will build on the prior lesson's activity. Using
pages 2-13 in your book as a resource, follow the steps below to create a
new Web page.

Course
Materials


  • Use
    Notepad if your operating system is Windows 95, 98, ME, 2000, or XP.


  • Use
    SimpleText if you're on a Macintosh.


Instructions


  1. On your computer
    desktop, create a new folder with the name of your Web site. Windows
    users:
    Right-click on your desktop and choose New --> Folder. A new
    folder icon will appear on your desktop. Select the
    text "New Folder" by clicking once on the text. Replace the text "New Folder"
    with the name of your Web site.


  2. Open a new, blank
    text file.


  3. Insert the four
    structural tags that you learned in the Lecture & Discussion pages.
    Remember to make your title reflect the purpose or content of your site. When you're
    finished with this step, you'll have a new text file with all the basic
    structural elements you'll need to move forward.


  4. Once you have created
    the "skeleton" for your Web page, choose File, Save As... from your
    text editor's menu.


  5. In the Save As
    dialog box, enter the name of your Web page, followed by an .html
    extension, for example:
    mypage.html. Save the file in the folder you created in step 1.


  6. Open your new page
    in your browser. (Double-click on the file icon that appears in your folder
    once you have saved the file.) You can also use your browser's File,
    Open
    commands to locate and open your Web page.


  7. Note that the page
    is empty, except for your page title, which is displayed on your browser's
    title bar at the top. If you bookmark your page, this is the title that
    will be displayed for future reference.


  8. Switch to your
    text editor to modify your page code. Inside the <body> container, enter
    a welcome message, and choose File, Save to save your changes.


  9. Switch to your
    browser and refresh the page by clicking the refresh button

    .
    (In Netscape Navigator, click "Reload.") Result:
    Your welcome message is displayed in the browser.


Discussion

Post your answers/comments
to the following questions as a response to this activity posting. You
can also post your finished work in the message boards. This will allow
you to get feedback from others in the class, see what others are building,
and help create a more interactive learning community.


  1. Did you encounter
    any problems with this first activity that you are unable to resolve? If
    so, share it with the class.


  2. Did you encounter
    any problems that you were able to resolve on your own? If so, share it
    with the class -- what you learned might be helpful to someone else.


Indian Bond

Indian Bond
~~~~~~~~

And we wondered why there was never and will never be an Indian Bond

On a flight, James bond was sitting beside an Indian guy.

Indian Guy: "Hello there, whets your name sir ??"

James Bond: "My name is Bond". Continuing in his inimitable style, " .....James Bond".

James Bond: "And you?"

Guy: "My name is Govender....."

"Collin Govender...."

"Siva Collin Govender .."

"Laxminarayana Siva Collin Govender.."

"Srinivasula Laxminarayana Siva Collin Govender.."

"Rajasekhara Srinivasula Laxminarayana Siva Collin Govender.."

"Sitaramanjaneyula Rajasekhara Srinivasula Laxminarayana Siva Collin Govender.."

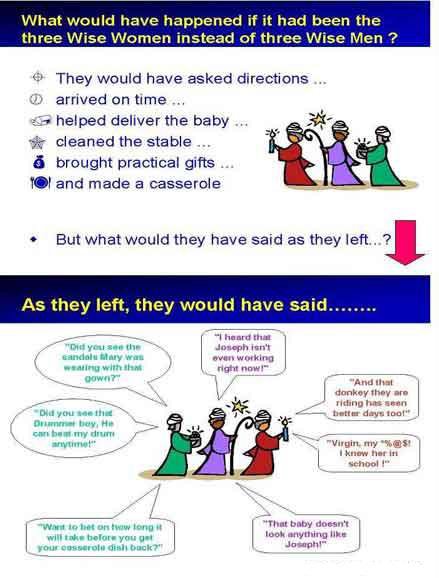
Three wise women... Posted by Picasa

Zoitsa the Gaian